
A step by step guide to a simple use case
Before we get to the practical execution, let’s quickly review Salesforce Account Engagement: this is the powerhouse platform to gather information, track, and engage with your accounts, leads, prospects and contacts. Please note: Salesforce Account Engagement used to be known as Pardot, and you may still find that name used in some older documentation and articles.
Let’s start with a relatively simple implementation: connecting your website’s contact form to Account Engagement. In this example we will use a form that’s built in the WordPress plugin Elementor (Pro), combined with a Form Handler that brings the data from your form into Account Engagement. We are opting for this plugin, because that’s what we are using on this website. It is possible to build forms directly in Account Engagement and integrate them into your website using an iframe, but the options for styling are limited. During these steps, we are frequently switching between the form on your website and Account Engagement, so pay close attention what you need to do where.
Step 1: build your form
Elementor’s drag-en-drop interface makes it easy to build a user-friendly contact form that aligns with your website design. You don’t have to be a coding wizard to use it, and it is easy to connect to a Form Handler, as we will show you in this step by step tutorial.
Things to consider when building your form:
- Think carefully about which fields are required and which are optional. Note: you always need an email address for Account Engagement.
- You can create custom fields for your business goals in Account Engagement (see Step 2), so you can include these in your form.
- Check the privacy statement on your website, does it mention processing of data in Account Engagement? If not, make the necessary changes.
- It is good practice to let every submitter check a box to confirm they have read your privacy statement before submitting.
Step 2: custom fields and the Form Handler in Account Engagement
Log in to Account Engagement. If you need any custom prospect fields specific to your business, create those first (or have them created by an Admin) in settings –> Object and Field Configuration –> Prospect Fields. You can find more information about custom fields here.
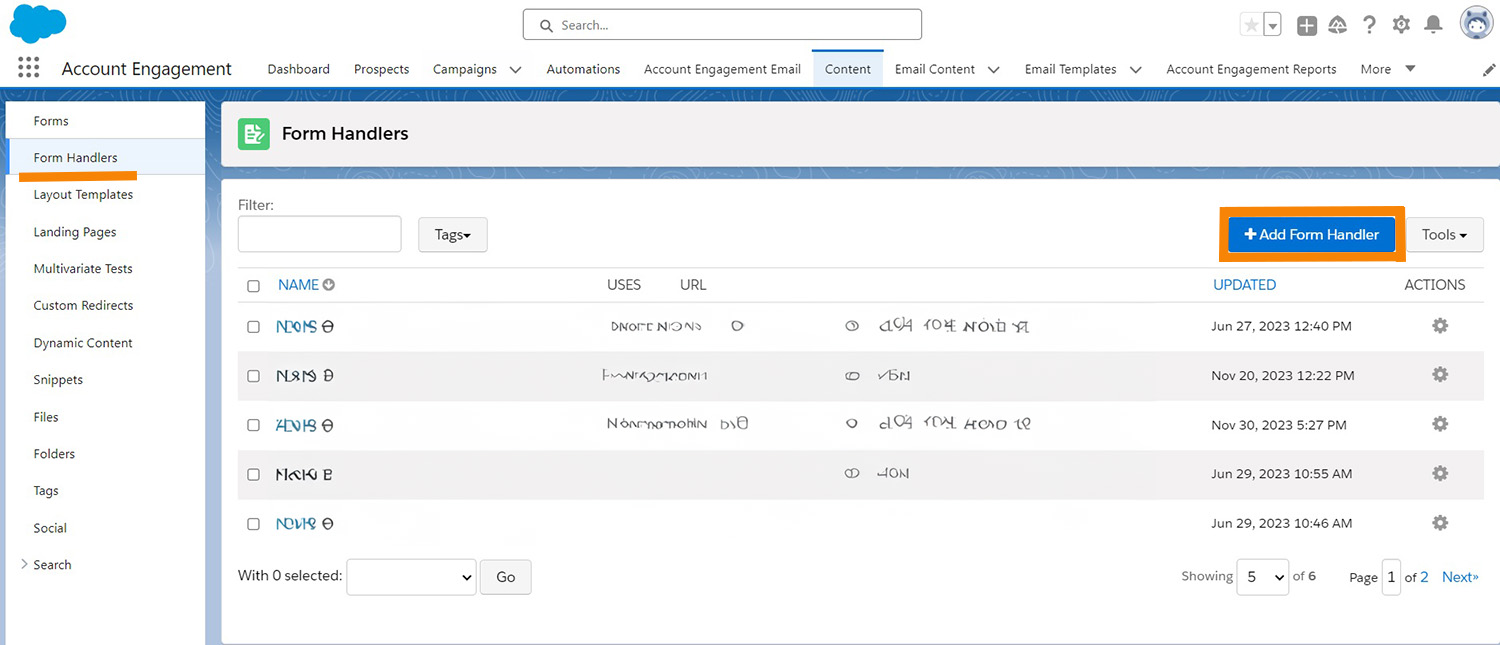
Next, navigate to ‘content’ and select ‘Form Handlers’ in the left-hand column. Click on +Add Form Handler in the top right of the screen. Follow the steps and click ‘Create Form Handler’. Note: you can always edit the name, folder and campaign later.
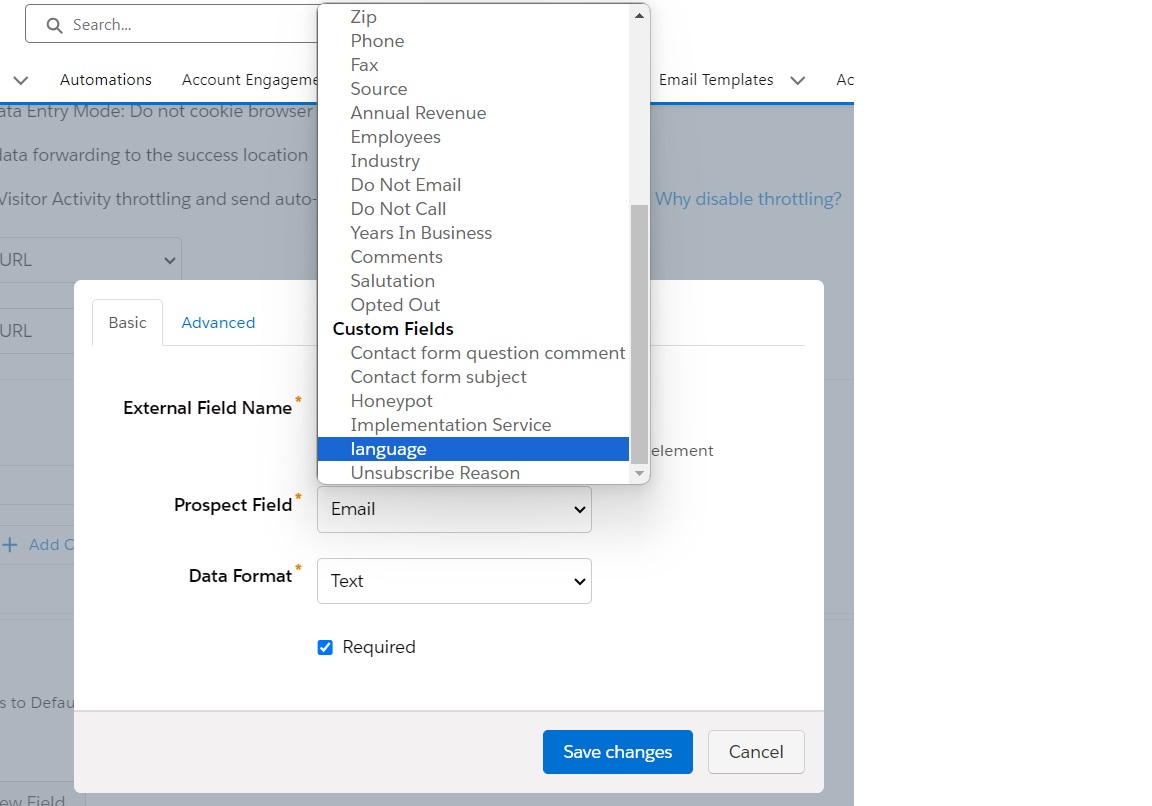
Add all fields you have created for your contact form. Your Custom Fields will appear below the standard fields in the drop-down list.
If you want to keep it simple, you can suffice with redirecting to a thank you page after someone has submitted a form. You can also add Completion Actions, for instance automatically send an email to each submitter, assign them to a Salesforce user, or notify a Slack channel when a form has been submitted (for this you will need to install the Slack Connector).
Step 3: connect Account Engagement to your Elementor form
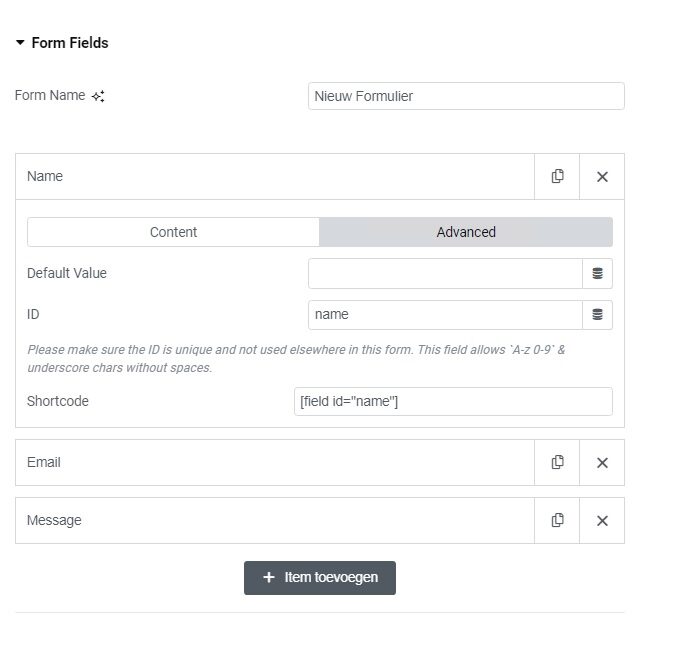
Now you are going to map the fields in your website’s form to Account Engagement’s Form Handler. This is important to get right, because that’s where your Elementor form and Form Handler connect to send the submitted data to Account Engagement. Go back to the form on your website. You will find the field IDs under ‘advanced’ in the settings of each field in your form.
Go back to your Form Handler and click ‘edit’. Map each field ID to the matching Account Engagement field in your Form Handler. Note: the ID and the name of the Account Engagement field do not have to be the same. For instance: a field with the field ID ‘fname’ in Elementor can be mapped to the field ‘First Name’ in Account Engagement, field IDs are case-sensitive. Also take care to match required fields in your form to required fields in your Form Handler. All documentation about Form Handlers can be found here. 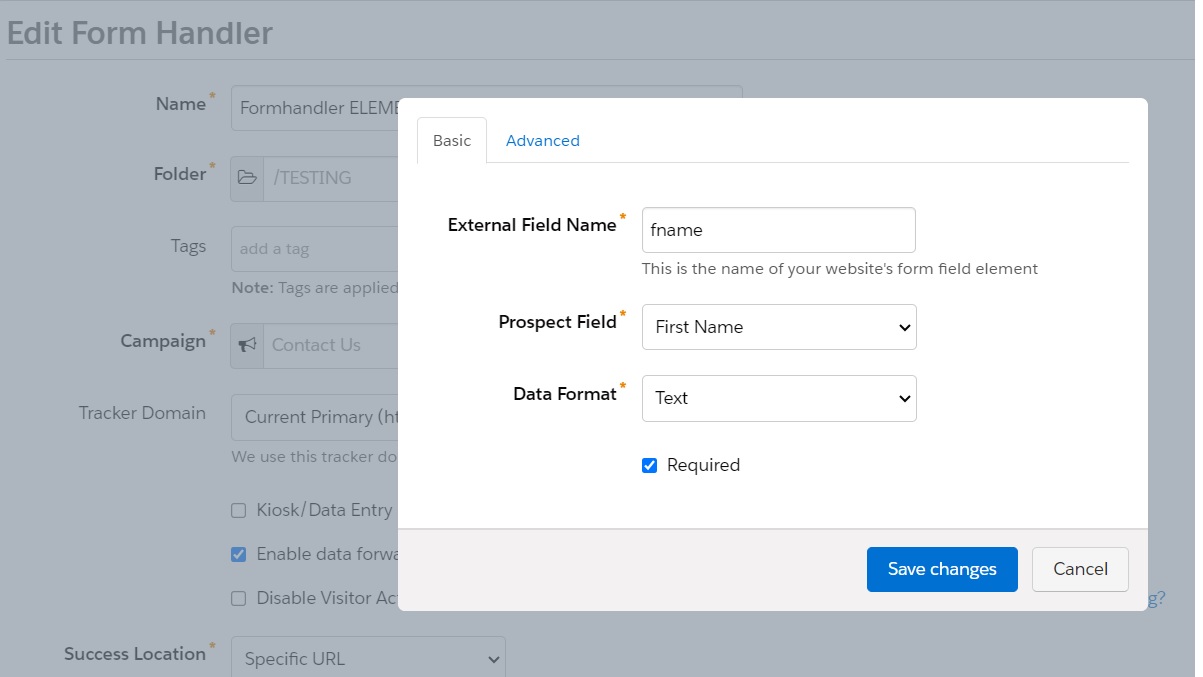
Find the URL of your Form Handler in Account Engagement under ‘Endpoint URL’. Always use the https version. Copy the URL.
Step 4: Configure Redirect in your form
Back to the form. Now you are going to use a little bit of code, but don’t worry, it’s not complicated. In your Elementor form, go to Actions After Submit –> Add Action –> Redirect
Click open Redirect to add the correct settings. Paste the endpoint URL of the form handler in the Redirect to field.
Still in the “Redirect to” field, type a ? after the URL and add all field IDs plus their shortcode of the fields you want to capture in Account Engagement, separated by a &.
Your string should look like this:
[your endpoint URL]?email=[field id=”email”]&fname=[field id=”fname”]&lname=[field id=”lname”]&company=[field id=”company”]&tel=[field id=”tel”]. You can add as many fields as you need. Watch how it’s done in this video.
Step 5: don’t forget to test!
Before unleashing your form on the world, give it a good test run. Submit some dummy data and make sure it populates correctly in Account Engagement. Also check if any Completion Actions are executed correctly.
Wrapping it up:
And there you have it, our step-by-step guide to integrate your contact form with Salesforce Account Engagement. You can use the first pearty data you have acquired to engage with your prospects and leads in a more relevant and personal way. Answer their questions about your services or events and, provided they opt-in, engage them with meaningful content.
If you have any questions about Salesforce Account Engagement or how to take your B2B marketing to the next level? Don’t hesitate to contact us, we would love to help!